- 0 Facebook
- 4 Pinterest
- 1 Email
- Copy Link
- 5 shares
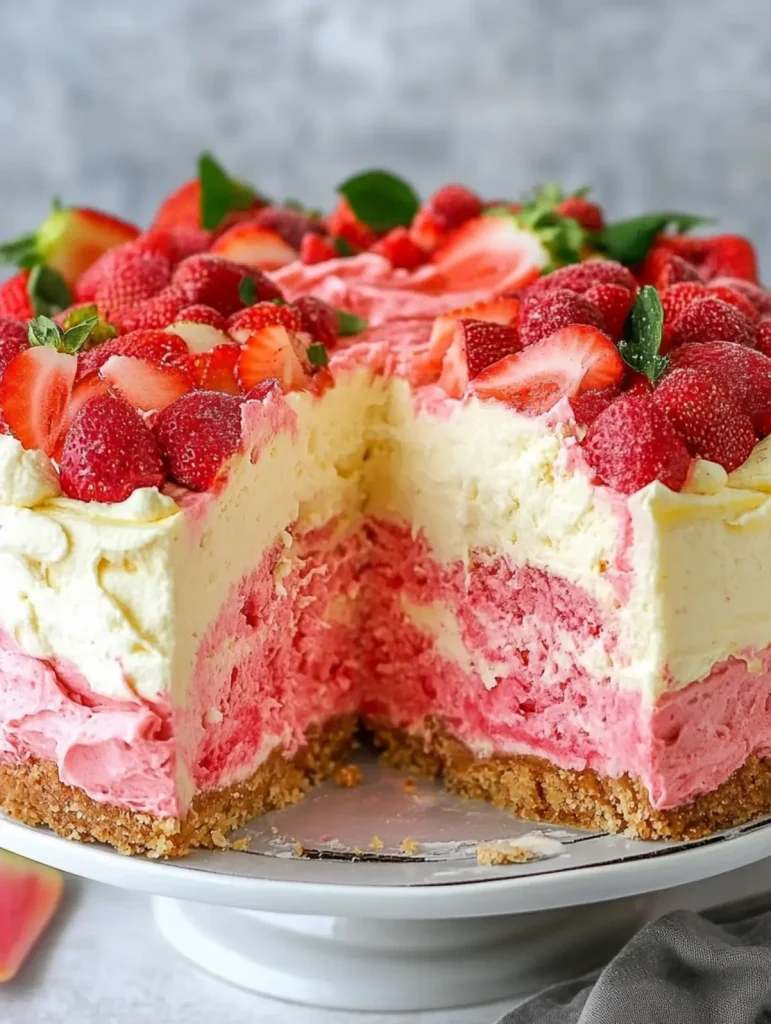
This luscious Strawberry Shortcake Cheesecake transforms three beloved desserts into one showstopping creation. Vibrant layers of strawberry cake and velvety cheesecake rest atop a ruby-red cookie crust — each bite delivering the perfect balance of creamy richness and fruity sweetness. The stunning pink-hued layers create a dessert that’s as beautiful as it is delicious, making it the ultimate centerpiece for summer gatherings. Serve chilled with a dollop of whipped cream and fresh strawberries for a dessert that celebrates the season’s most beloved fruit.
Why You’ll Love This Recipe
This Strawberry Shortcake Cheesecake combines the best elements of three classic desserts into one spectacular treat that’s guaranteed to impress. Here’s why it’s worth every minute of preparation:
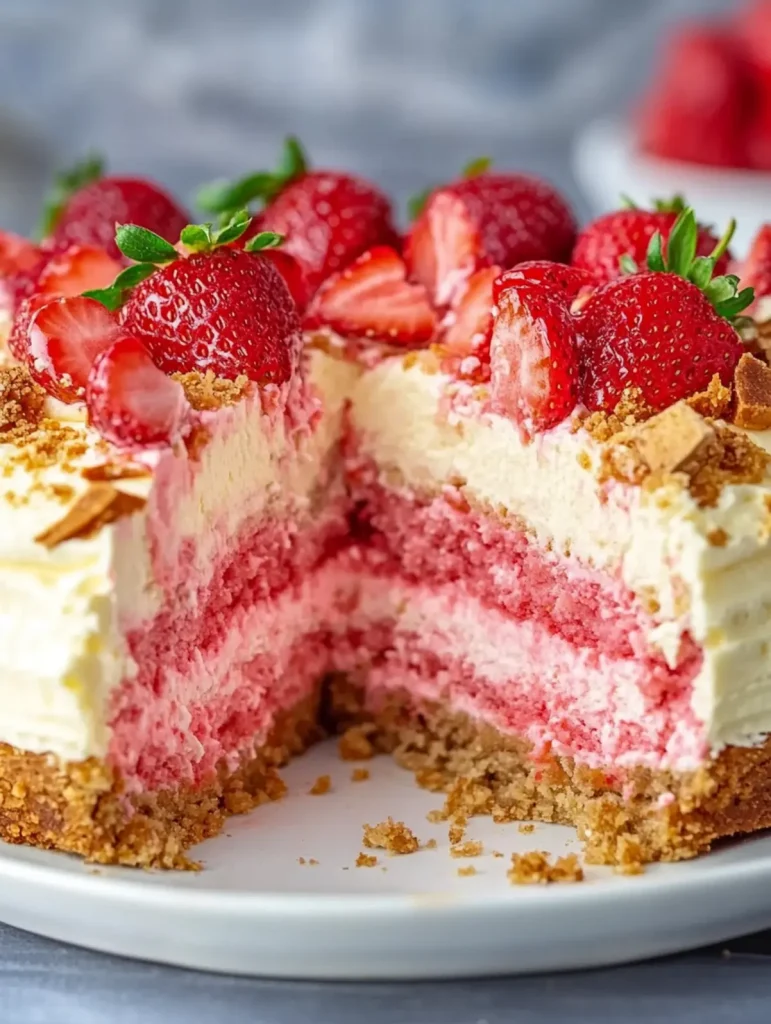
- Show-Stopping Presentation : The distinct ruby-red and creamy pink layers create a visual masterpiece that elicits gasps when sliced and served at gatherings.
- Balanced Texture Contrast : Each forkful delivers the perfect combination of buttery cookie crunch, fluffy cake softness, and silky cheesecake creaminess for an extraordinary dessert experience.
- Make-Ahead Marvel : The cheesecake actually improves after 24 hours in the refrigerator , allowing flavors to meld beautifully while giving busy home cooks flexibility with timing.
- Foolproof Success : The layered construction method eliminates common cheesecake issues like cracking or sinking, making this impressive dessert surprisingly accessible for bakers of all skill levels.
- Crowd-Tested Favorite : This dessert consistently disappears first at potlucks and family gatherings, with guests inevitably requesting the recipe before heading home.
Ingredient Breakdown with Tips
The success of this Strawberry Shortcake Cheesecake depends largely on understanding how each ingredient contributes to the final masterpiece. Every component plays a crucial role in creating the perfect balance of textures, flavors, and that stunning visual appeal.
For The Cookie Crumb Layer:
- Vanilla sandwich cookies : These provide the perfect sweet base with built-in creaminess. Golden Oreos or Nilla Wafers work beautifully, offering the ideal structure for supporting multiple layers.
- Strawberry gelatin mix : This infuses the crust with intense strawberry flavor and contributes to the vibrant pink color. Use name-brand gelatin for the most consistent results and truest strawberry flavor.
- Unsalted butter : Acts as the binding agent for the crust while adding richness. Always use unsalted to control sodium levels in your dessert.
- Red food color gel : Enhances the visual appeal with a deeper ruby-red hue. Gel colorings are preferred over liquid as they won’t alter the moisture content of your crust.
For The Strawberry Cake Layers:
- Strawberry Supreme cake mix : Provides consistent texture and reliable strawberry flavor. Look for premium brands with real strawberry pieces for best results.
- Large eggs, room temperature : Critical for proper emulsification and structure. Always bring eggs to room temperature for 30 minutes before mixing for the fluffiest cake texture.
- Unsalted butter, melted : Adds richness and moisture to the cake layers. The melted state ensures even distribution throughout the batter.
- Whole milk : Creates tender cake crumb and adds moisture. The fat content is important – avoid substituting with lower-fat alternatives.
- Strawberry gelatin mix : Intensifies the strawberry flavor and creates that signature pink color. This double-dose of strawberry is what elevates this dessert beyond ordinary cake.
For The Cheesecake Layer:
- Granulated sugar : Provides sweetness while helping create that silky texture. Fine granulated sugar dissolves more readily than coarser varieties.
- Cornstarch : Acts as a stabilizer, preventing cracks and helping achieve that perfect slice. Don’t skip this ingredient as it’s key to a foolproof cheesecake.
- Cream cheese, softened : The star ingredient that provides that distinctive tangy flavor and creamy texture. Philadelphia brand is recommended by professional bakers for its consistent quality.
- Heavy cream : Contributes luxurious richness and helps achieve that velvety mouthfeel. Look for cream with at least 36% fat content for best results.
- Pure vanilla extract : Enhances overall flavor profile and balances the tartness of cream cheese. Always use pure rather than imitation for superior flavor.
- Large eggs, room temperature : Provide structure while maintaining creaminess. Beat just until incorporated to prevent introducing air bubbles.
For The Frosting:
- Cream cheese, softened : Creates a tangy, stable frosting that pairs perfectly with the strawberry elements. Ensure it’s fully softened to avoid lumps.
- Heavy cream : Gives the frosting a light, whipped texture while maintaining structure. Chill the mixing bowl beforehand for optimal whipping.
- Unsalted butter, softened : Adds richness and helps stabilize the frosting. The combination with cream cheese creates the perfect spreadable consistency.
- Vanilla extract : Balances flavors and adds depth to complement the strawberry elements. Madagascar bourbon vanilla offers exceptional flavor if available.
- Powdered sugar : Sweetens while providing structure to the frosting. Sift before adding to eliminate any lumps for the smoothest finish.
Step-by-Step Instructions
- Prepare the cookie crumb layer by pulsing the vanilla sandwich cookies in a food processor until finely crushed. Mix with strawberry gelatin powder, melted butter, and red food coloring gel until evenly combined. Press firmly into the bottom of a greased 9-inch springform pan and refrigerate while preparing the next layers.
- Make the strawberry cake layers by combining the cake mix, eggs, melted butter, milk, and strawberry gelatin in a large bowl. Beat with an electric mixer for 2 minutes until smooth and well blended. I find dividing the batter into two portions helps create more even layers when assembling.
- Pour half the cake batter over the chilled cookie base and spread evenly with an offset spatula. Reserve the remaining batter for later use. This first cake layer creates the foundation for our spectacular dessert.
- Create the cheesecake filling by beating together the cream cheese and sugar until fluffy, about 3 minutes. Mix in the cornstarch, then gradually add the heavy cream and vanilla extract. Add eggs one at a time, mixing just until incorporated—overbeating introduces too much air and can cause cracks.
- Layer the cheesecake mixture carefully over the first cake layer, smoothing the top. Gently pour the remaining strawberry cake batter over the cheesecake layer. Don’t worry if it seems to sink slightly—during baking, the layers will sort themselves beautifully.
- Bake in a preheated 325°F oven for 70-80 minutes until the center is almost set but still slightly jiggly. Turn off the oven , prop the door open slightly, and allow the cheesecake to cool gradually for 1 hour—this prevents cracking that can happen with sudden temperature changes.
- Prepare the cream cheese frosting once the cheesecake has cooled completely. Beat the cream cheese and butter until smooth, then add the vanilla. Gradually incorporate the powdered sugar, then whip in the heavy cream until the frosting is light and fluffy. I like to taste test here and adjust the sweetness if needed.
- Frost the chilled cheesecake with a generous layer of the cream cheese frosting, creating decorative swirls on top. Refrigerate for at least 4 hours, but preferably overnight, to allow the flavors to meld together perfectly before serving your stunning creation.
Remember: Patience is key with this dessert—each cooling and chilling step is essential for achieving those picture-perfect layers when you slice into your masterpiece!
Variations & Substitutions
Baking should be both fun and flexible! This dreamy strawberry shortcake cheesecake is already a showstopper, but feel free to customize it to fit your preferences or what’s in your pantry.
- Cookie base alternatives: Don’t have vanilla sandwich cookies? Graham crackers, digestive biscuits, or shortbread cookies make excellent substitutions for the base—just add an extra tablespoon of butter to ensure they hold together properly.
- Make it naturally pink: For those avoiding artificial colors, skip the food coloring and use freeze-dried strawberries! Pulverize them into a fine powder and mix into both the crust and cake layers for natural color and an extra punch of strawberry flavor.
- Go gluten-free: I’ve successfully made this with gluten-free vanilla cookies for the base and a good quality gluten-free strawberry cake mix—just be sure to add 1/2 teaspoon of xanthan gum to the cake mix if it doesn’t already contain it for proper structure.
- Flavor twist options: Try raspberry or cherry gelatin instead of strawberry for a different berry profile, or experiment with a marble effect by dividing the cheesecake batter and adding different flavored gelatins to each portion before swirling together.
- Cream cheese alternatives: For a lighter version, substitute up to half of the cream cheese with Neufchâtel cheese or Greek yogurt cream cheese. This reduces calories while maintaining that crucial tangy flavor and creamy texture.
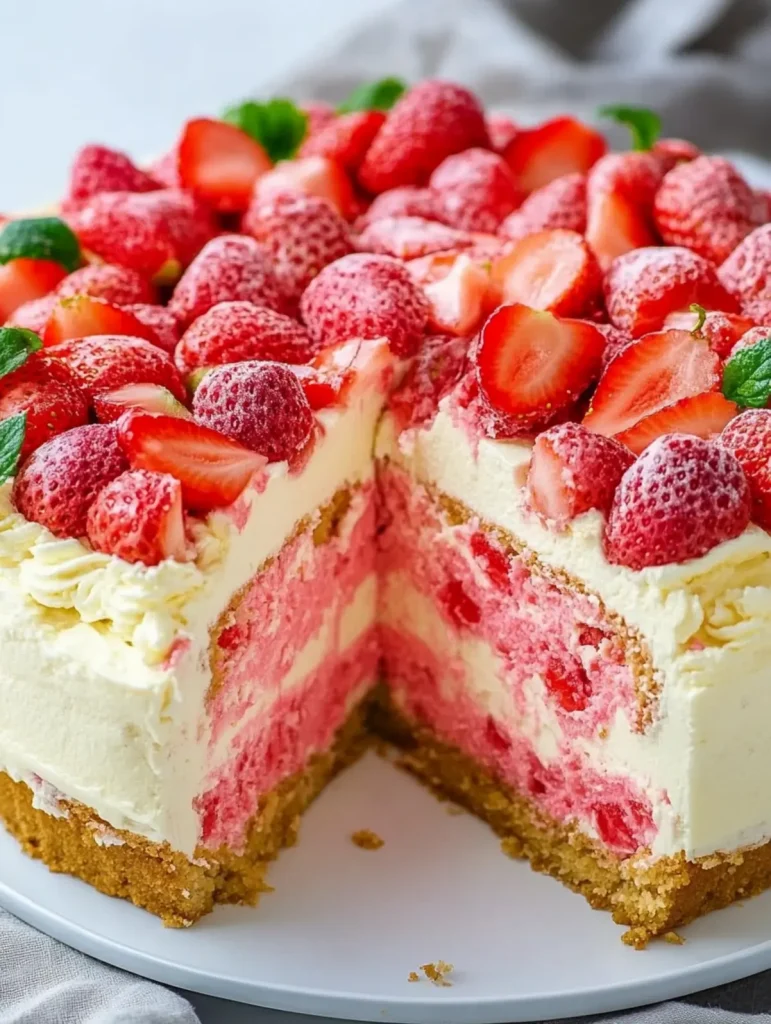
- Seasonal fresh fruit topping: While this cheesecake is perfectly delicious as is, a topping of macerated fresh strawberries (sliced berries tossed with a tablespoon of sugar) creates a gorgeous, juicy crown that elevates this dessert for special occasions.
Storage & Freezing
This Strawberry Shortcake Cheesecake needs proper storage to maintain its delightful layers and flavors. Refrigerate any leftovers in an airtight container or cover the springform pan tightly with plastic wrap for up to 5 days. The flavor actually improves after the first 24 hours as the strawberry and cream cheese elements meld together beautifully.
For longer storage, this cheesecake freezes surprisingly well. Cut the completely chilled cheesecake into individual slices and place them on a baking sheet to freeze for 2 hours before transferring to freezer bags or containers. This prevents the slices from sticking together and allows for easy single-serving defrosting. Properly stored, the cheesecake will maintain its quality for up to 2 months in the freezer. I’ve found placing a small piece of parchment between slices prevents the frosting from transferring when stacked.
When ready to serve frozen cheesecake, thaw individual slices in the refrigerator for 3-4 hours or overnight rather than at room temperature. The gradual thawing preserves the creamy texture of both the cheesecake layer and frosting. The gelatin-enhanced cookie base may soften slightly after freezing, but the overall dessert integrity remains intact. For the freshest presentation, add a few fresh strawberry slices just before serving to brighten both the appearance and flavor.
Expert Tips
Master these insider tricks to achieve a perfect Strawberry Shortcake Cheesecake that looks and tastes professional:
- Temperature matters : Make sure all refrigerated ingredients (cream cheese, eggs, butter) reach room temperature before mixing—this prevents lumps in your cheesecake layer and creates a smoother batter.
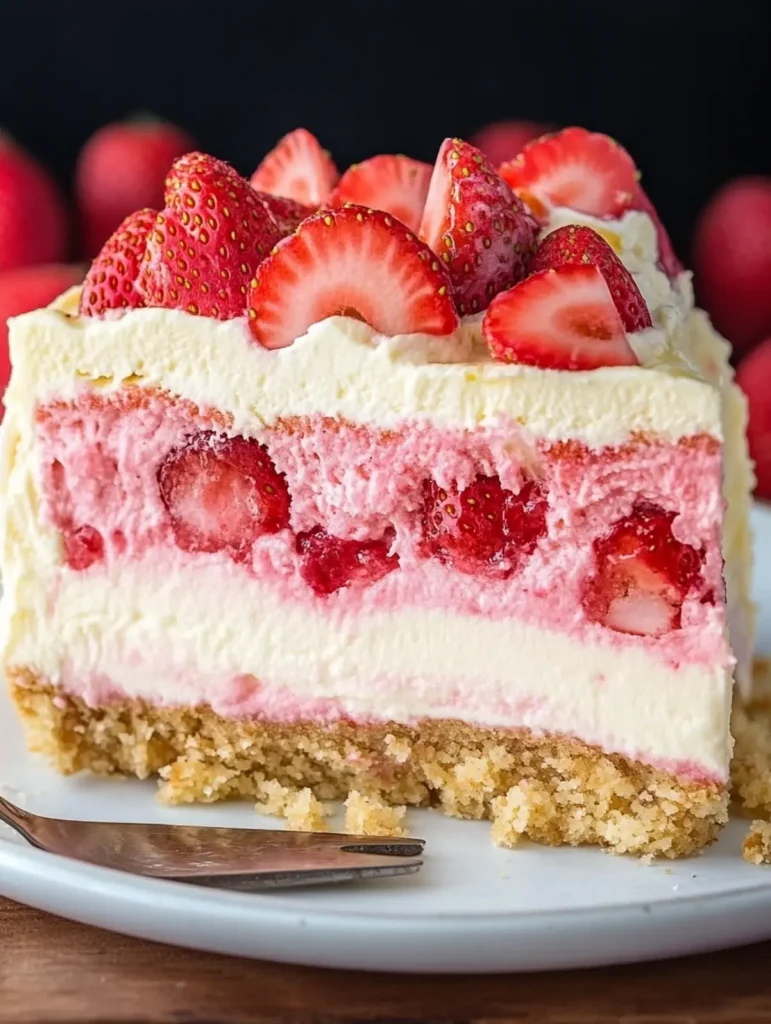
- Create clean layers : I’ve found chilling the first cake layer for 15 minutes before adding the cheesecake mixture helps maintain distinct, photo-worthy separation between the beautiful pink and creamy white layers.
- Prevent cracks naturally : The cornstarch in the cheesecake mixture works as a stabilizer, but for extra insurance, place a shallow pan of water on the bottom rack while baking to create humidity in the oven .
- Gelatin color control : When mixing the strawberry gelatin into both the cookie base and cake layers, start with less food coloring than you think you need—you can always add more drops to achieve your desired pink intensity.
- Frosting perfection : For the silkiest cream cheese frosting, beat the softened cream cheese and butter together first until completely smooth before adding any other ingredients—patience here prevents frustrating lumps later.
Serving Suggestions
This Strawberry Shortcake Cheesecake deserves a presentation as spectacular as its layers! The triple-threat dessert stands beautifully on its own, but a few thoughtful accompaniments can elevate it even further.
For an elegant dinner party presentation, serve thin slices with a dollop of fresh whipped cream and a fan of thinly sliced strawberries. I love to add a small sprig of mint and a light dusting of powdered sugar for a professional finishing touch. The contrast between the bright berries and the pink layers creates an Instagram-worthy dessert moment.
This rich dessert pairs beautifully with beverages that complement its creamy-sweet flavor profile. Try serving it with a chilled glass of Prosecco, a dessert tea like Earl Grey with cream, or even a strawberry-infused lemonade for a non-alcoholic option. For coffee lovers, a small cup of espresso offers the perfect bitter counterpoint to the cheesecake’s sweetness.
For a dessert bar setup, consider offering a “topping station” alongside your Strawberry Shortcake Cheesecake. Set out bowls of macerated strawberries, white chocolate shavings, crushed vanilla cookies (using the same ones from the crust), and warm strawberry sauce made by simmering fresh berries with a touch of sugar. This interactive approach lets guests customize their slice while showcasing the versatility of this showstopping dessert.
Make-Ahead Tips for Strawberry Shortcake Cheesecake
This Strawberry Shortcake Cheesecake is a meal prep dream that actually improves with advance preparation! You can complete the entire dessert (minus frosting) up to 48 hours ahead and refrigerate covered with plastic wrap. The cookie crust can be pressed and chilled up to 3 days in advance, while the cream cheese frosting stores beautifully in the refrigerator for up to 5 days (just re-whip before using). For ultimate time-saving, assemble and bake the complete cheesecake layers 24 hours before your event, then add the final frosting layer just before serving. The extended chilling time allows all the strawberry flavors to meld together perfectly, creating an even more delicious result than when served immediately.
Recipe FAQs
Can I use fresh strawberries in this recipe? Yes! Fold 1 cup diced berries into the cheesecake layer.
How do I prevent my cheesecake from cracking? Avoid overbeating eggs and use the gradual cooling method.
Can I make this without strawberry gelatin? I use freeze-dried strawberries pulverized with sugar instead.
Is there a shortcut version of this recipe? No, the magic comes from the distinct layering process.
How far in advance can I make this cheesecake? Up to 3 days ahead—flavors improve overnight!
What’s a substitute for vanilla sandwich cookies? Graham crackers mixed with 2 tablespoons sugar work perfectly.
- 0 Facebook
- 4 Pinterest
- 1 Email
- Copy Link
- 5 shares
Dreamy Strawberry Shortcake Cheesecake: The Ultimate Summer Dessert
Ingredients
Instructions
- Prepare the cookie crumb layer
by pulsing the vanilla sandwich cookies in a food processor until finely crushed. Mix with strawberry gelatin powder, melted butter, and red food coloring gel until evenly combined. Press firmly into the bottom of a greased 9-inch springform pan and refrigerate while preparing the next layers.
- Make the strawberry cake layers
by combining the cake mix, eggs, melted butter, milk, and strawberry gelatin in a large bowl. Beat with an electric mixer for 2 minutes until smooth and well blended. I find dividing the batter into two portions helps create more even layers when assembling.
- Pour half the cake batter
over the chilled cookie base and spread evenly with an offset spatula. Reserve the remaining batter for later use. This first cake layer creates the foundation for our spectacular dessert.
- Create the cheesecake filling
by beating together the cream cheese and sugar until fluffy, about 3 minutes. Mix in the cornstarch, then gradually add the heavy cream and vanilla extract. Add eggs one at a time, mixing just until incorporated—overbeating introduces too much air and can cause cracks.
- Layer the cheesecake mixture
carefully over the first cake layer, smoothing the top. Gently pour the remaining strawberry cake batter over the cheesecake layer. Don’t worry if it seems to sink slightly—during baking, the layers will sort themselves beautifully.
- Bake in a preheated 325°F oven
for 70-80 minutes until the center is almost set but still slightly jiggly. Turn off the oven, prop the door open slightly, and allow the cheesecake to cool gradually for 1 hour—this prevents cracking that can happen with sudden temperature changes.
- Prepare the cream cheese frosting
once the cheesecake has cooled completely. Beat the cream cheese and butter until smooth, then add the vanilla. Gradually incorporate the powdered sugar, then whip in the heavy cream until the frosting is light and fluffy. I like to taste test here and adjust the sweetness if needed.
- Frost the chilled cheesecake
with a generous layer of the cream cheese frosting, creating decorative swirls on top. Refrigerate for at least 4 hours, but preferably overnight, to allow the flavors to meld together perfectly before serving your stunning creation.
Notes
Patience is key with this dessert—each cooling and chilling step is essential for achieving those picture-perfect layers when you slice into your masterpiece!
Nutrition
| Serving Size | 1 slice |
|---|---|
| Calories | 490 calories |
| Sugar Content | 38g |
| Sodium Content | 380mg |
| Fat Content | 30g |
| Saturated Fat Content | 18g |
| Unsaturated Fat Content | 10g |
| Trans Fat Content | 0g |
| Carbohydrate Content | 42g |
| Fiber Content | 1g |
| Protein Content | 5g |
| Cholesterol Content | 90mg |