Introduction
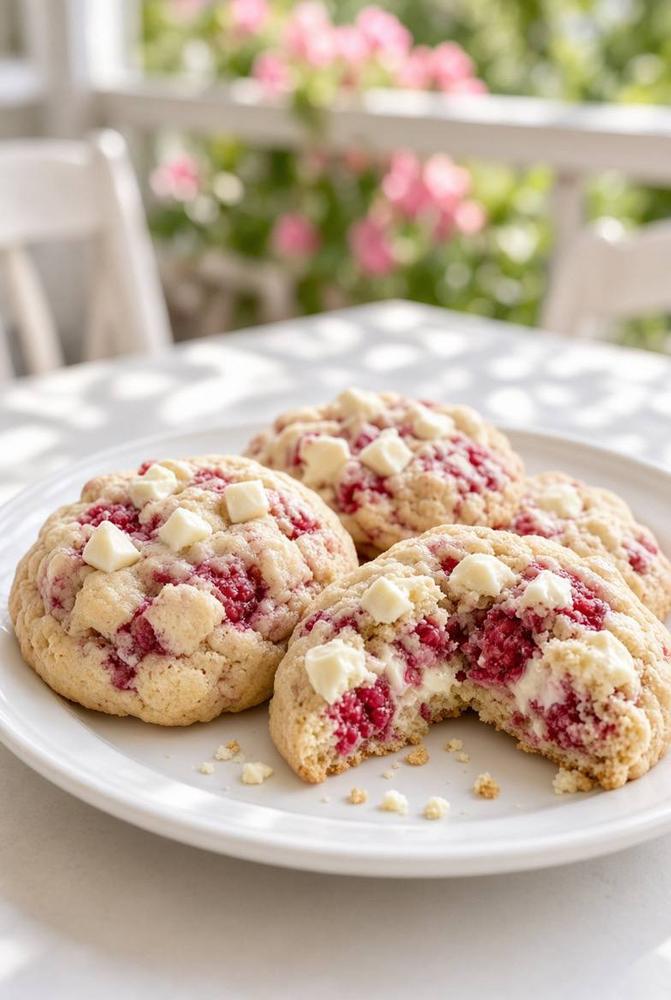
There’s something undeniably magical about a fresh-baked cookie, and these White Chocolate Raspberry Cookies are no exception. Imagine a soft, chewy base studded with creamy pockets of melted white chocolate and bursts of bright, tangy raspberries. It’s a symphony of flavors and textures that dances on your palate, making these cookies an absolute showstopper. Perfect for a sunny afternoon treat, a delightful addition to a spring or summer gathering, or simply a comforting indulgence, they effortlessly combine classic comfort with a touch of gourmet elegance.
What makes this particular recipe stand out is the exquisite balance between the rich sweetness of white chocolate and the vibrant tartness of fresh raspberries. Unlike some cookies that can be overly sweet, the fruit provides a beautiful counterpoint, creating a harmonious and utterly addictive flavor profile. The slight chewiness of the cookie itself, with its golden edges and tender center, acts as the perfect canvas for these star ingredients. Every bite offers a delightful surprise, whether it’s a creamy chunk of chocolate melting in your mouth or the juicy pop of a fresh raspberry. They’re not just cookies; they’re an experience, promising to become a cherished favorite in your baking repertoire.
Whether you’re an experienced baker or just starting your culinary journey, this recipe is designed to be approachable and rewarding. We’ll guide you through each step, ensuring you achieve that perfect balance of flavor and texture every time. Get ready to fill your kitchen with the irresistible aroma of baking and delight your senses with these truly exceptional White Chocolate Raspberry Cookies.
Nutritional Information
Per serving (approximate values, for one 50g cookie):
- Calories: 250
- Protein: 3g
- Carbohydrates: 35g
- Fat: 11g
- Fiber: 1g
- Sodium: 120mg
Ingredients
- 1 cup (2 sticks) unsalted butter, softened
- 3/4 cup granulated sugar
- 3/4 cup packed light brown sugar
- 2 large eggs
- 1 teaspoon vanilla extract
- 2 1/4 cups all-purpose flour
- 1 teaspoon baking soda
- 1/2 teaspoon salt
- 1 1/2 cups white chocolate chips or chopped white chocolate bar
- 1 cup fresh raspberries, gently mashed or roughly chopped (see tips for frozen)
Instructions
- Preheat your oven to 375°F (190°C). Line two baking sheets with parchment paper or silicone baking mats.
- In a large bowl, using an electric mixer, cream together the softened unsalted butter, granulated sugar, and light brown sugar until light and fluffy, about 2-3 minutes. Scrape down the sides of the bowl as needed.
- Beat in the eggs one at a time, mixing well after each addition. Stir in the vanilla extract until fully combined.
- In a separate medium bowl, whisk together the all-purpose flour, baking soda, and salt.
- Gradually add the dry ingredients to the wet ingredients, mixing on low speed until just combined. Be careful not to overmix the dough.
- Gently fold in the white chocolate chips or chopped white chocolate bar.
- Carefully fold in the mashed or chopped fresh raspberries. Be gentle to avoid over-mashing them and causing too much bleeding into the dough. If using frozen raspberries, do not thaw them completely; add them frozen and toss them lightly in a tablespoon of flour before adding to the dough to minimize bleeding.
- Drop rounded tablespoons of dough onto the prepared baking sheets, leaving about 2 inches between each cookie. For larger cookies, use a 1.5-inch cookie scoop.
- Bake for 10-12 minutes, or until the edges are lightly golden brown and the centers are still slightly soft. The cookies will continue to set as they cool.
- Remove the baking sheets from the oven and, if desired, press a few extra white chocolate chunks and raspberry pieces onto the top of the warm cookies for an enhanced visual appeal.
- Let the cookies cool on the baking sheets for 5 minutes before transferring them to a wire rack to cool completely.
Cooking Tips and Variations
Achieving cookie perfection is a delightful journey, and with a few key tips, your White Chocolate Raspberry Cookies will be absolutely irresistible every time. One of the most crucial elements is the butter: ensure it’s truly softened, not melted. Softened butter creams beautifully with the sugars, creating air pockets that contribute to a light and fluffy cookie texture. If your butter is too cold, it won’t cream properly, and if it’s melted, your cookies will likely spread too much and become greasy. Another tip for perfect texture is to avoid overmixing the dough once the flour is added. Overmixing develops the gluten in the flour, leading to tough, dense cookies instead of the desired soft and chewy ones. Mix until the flour streaks have just disappeared, then stop.
When it comes to the star ingredients, the quality of your white chocolate makes a difference. Opt for good quality white chocolate chips or, even better, a chopped white chocolate bar. Higher quality white chocolate tends to melt more smoothly and has a richer, creamier flavor that truly elevates the cookies. For the raspberries, if you’re using fresh, gently mash or chop them; you want pieces, not a puree, to ensure those beautiful bursts of flavor and color. If you’re using frozen raspberries, there’s a trick to prevent them from bleeding too much into your dough: do not thaw them completely. Instead, add them frozen and, if you’re concerned about color bleed, toss them lightly in a tablespoon of flour before incorporating them into the dough. This light coating helps to absorb some of the moisture and keeps the color contained.
For presentation, a little trick goes a long way. Immediately after removing the cookies from the oven, while they are still warm and pliable, gently press a few extra white chocolate chunks and small pieces of fresh raspberry onto the tops of the cookies. This creates a visually stunning effect, highlighting the key ingredients and making your cookies look professionally baked. Don’t be afraid to experiment with chilling your dough for at least 30 minutes, or even up to 24 hours. Chilling helps to firm up the butter, preventing the cookies from spreading too much, and also allows the flavors to meld and deepen, resulting in a more complex and flavorful cookie.
Troubleshooting common cookie issues can save your batch. If your cookies are spreading too much, your butter might have been too warm, or your oven might not be at the correct temperature (a common issue, so an oven thermometer is a great investment!). Chilling the dough can help, as can ensuring your baking soda is fresh. If your cookies are too dry or crumbly, you might have added too much flour or overbaked them. Remember, cookies continue to bake slightly on the hot baking sheet after they come out of the oven, so it’s okay if the centers look a little underdone when you pull them out.
Variations:
- Lemon Zest Brightness: For an extra layer of bright, citrusy flavor, add 1-2 teaspoons of fresh lemon zest to the dough with the wet ingredients. Lemon and raspberry are a match made in heaven!
- Nutty Crunch: Introduce a delightful textural contrast by folding in 1/2 cup of finely chopped pecans or walnuts along with the white chocolate.
- Mixed Berry Delight: Swap out half of the raspberries for an equal amount of chopped strawberries or blueberries for a mixed berry twist.
- Spiced Warmth: For a cozy variation, add 1/2 teaspoon of ground cinnamon or a pinch of cardamom to the dry ingredients. This pairs beautifully with white chocolate.
- Cookie Bar Form: Instead of individual cookies, press the dough into a greased 9×13 inch baking pan and bake for 25-30 minutes, or until golden brown and set. Cut into bars once cooled.
- Gluten-Free Option: You can often substitute the all-purpose flour with a 1:1 gluten-free baking flour blend (ensure it contains xanthan gum) for a gluten-free version. Results may vary slightly in texture.
Storage and Reheating
To keep your White Chocolate Raspberry Cookies at their absolute best, proper storage is key. Once completely cooled, store the cookies in an airtight container at room temperature. They will remain fresh and delicious for up to 3-4 days. Placing a slice of plain white bread in the container with the cookies can help keep them soft and moist by absorbing excess moisture from the air, a classic baker’s trick.
If you’ve baked a large batch or want to enjoy these treats over a longer period, these cookies freeze beautifully. To freeze, arrange the completely cooled cookies in a single layer on a baking sheet and place them in the freezer for about 1-2 hours, or until solid. This “flash freezing” prevents them from sticking together. Once frozen, transfer the cookies to a freezer-safe airtight container or heavy-duty freezer bag, separating layers with parchment paper if stacking. They can be stored in the freezer for up to 2-3 months. Thaw frozen cookies at room temperature for a few hours, or overnight in the refrigerator.
While these cookies are fantastic at room temperature, a brief reheat can bring back that wonderful fresh-from-the-oven warmth, especially if you enjoy the melted white chocolate. To reheat, place individual cookies on a microwave-safe plate and microwave for 10-15 seconds, or until just warmed through. Be careful not to overheat, as this can dry them out. Alternatively, you can warm them in a preheated oven or toaster oven at 275°F (135°C) for 5-7 minutes, until soft and warm. This method often yields a slightly crisper edge while keeping the center tender.
Frequently Asked Questions
Can I use frozen raspberries instead of fresh?
Yes, you can absolutely use frozen raspberries! The key is not to thaw them completely before adding them to the dough. Add them frozen, and for an extra measure to prevent too much color bleeding, you can lightly toss the frozen raspberries in a tablespoon of flour before folding them into the dough. This helps absorb some of their moisture.
Why did my cookies spread too much?
There are several reasons cookies might spread excessively. Your butter might have been too warm (melted instead of just softened), your oven temperature might be too low (get an oven thermometer!), or you might have added too much leavening (baking soda). Chilling the dough for at least 30 minutes before baking can also significantly help prevent spreading.
Can I make the cookie dough ahead of time?
Absolutely! Cookie dough is excellent for making ahead. You can prepare the dough, cover it tightly with plastic wrap, and refrigerate it for up to 2-3 days. This actually allows the flavors to meld and deepen, often resulting in an even more flavorful cookie. When ready to bake, let the dough sit at room temperature for about 15-20 minutes to soften slightly before scooping and baking as usual.
What’s the best way to get perfectly round cookies?
For perfectly round cookies, use a cookie scoop to ensure uniform size. Immediately after removing the cookies from the oven, while they are still very warm and pliable, you can take a large round cookie cutter (or even an upside-down glass) that is slightly larger than your cookie and gently swirl it around the cookie on the baking sheet. This pushes the edges in and creates a perfectly round shape.
White Chocolate Raspberry Cookies
Ingredients
Instructions
Preheat your oven to 375°F (190°C). Line two baking sheets with parchment paper or silicone baking mats.
In a large bowl, using an electric mixer, cream together the softened unsalted butter, granulated sugar, and light brown sugar until light and fluffy, about 2-3 minutes. Scrape down the sides of the bowl as needed.
Beat in the eggs one at a time, mixing well after each addition. Stir in the vanilla extract until fully combined.
In a separate medium bowl, whisk together the all-purpose flour, baking soda, and salt.
Gradually add the dry ingredients to the wet ingredients, mixing on low speed until just combined. Be careful not to overmix the dough.
Gently fold in the white chocolate chips or chopped white chocolate bar.
Carefully fold in the mashed or chopped fresh raspberries. Be gentle to avoid over-mashing them and causing too much bleeding into the dough. If using frozen raspberries, do not thaw them completely; add them frozen and toss them lightly in a tablespoon of flour before adding to the dough to minimize bleeding.
Drop rounded tablespoons of dough onto the prepared baking sheets, leaving about 2 inches between each cookie. For larger cookies, use a 1.5-inch cookie scoop.
Bake for 10-12 minutes, or until the edges are lightly golden brown and the centers are still slightly soft. The cookies will continue to set as they cool.
Remove the baking sheets from the oven and, if desired, press a few extra white chocolate chunks and raspberry pieces onto the top of the warm cookies for an enhanced visual appeal.
Let the cookies cool on the baking sheets for 5 minutes before transferring them to a wire rack to cool completely.