Introduction
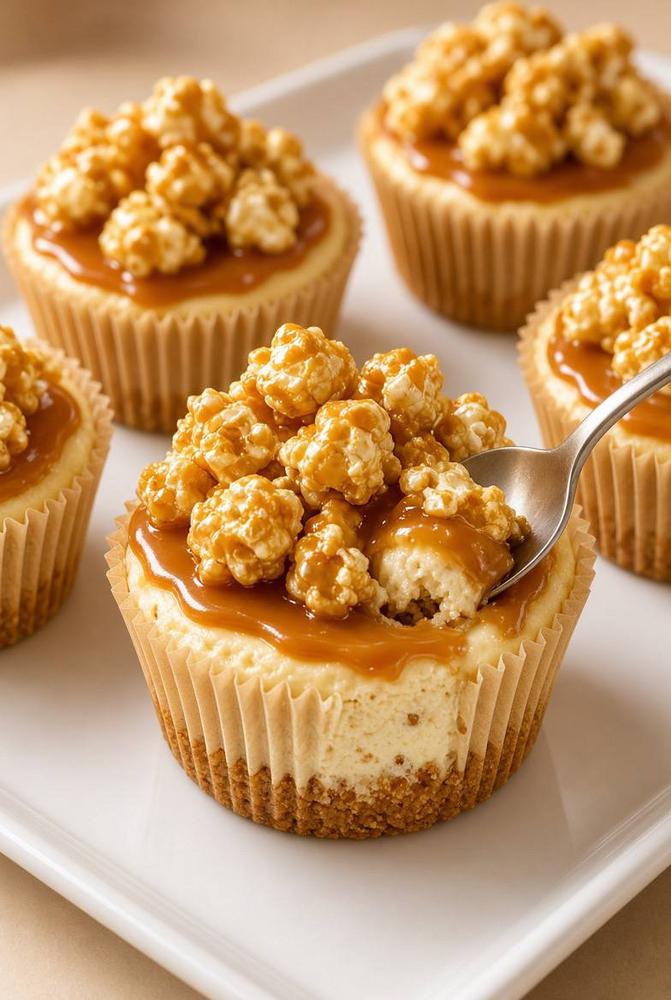
Get ready to experience a dessert that hits all the right notes: sweet, salty, creamy, and crunchy! Our Caramel Popcorn Cheesecake Cups are an absolute showstopper, marrying the smooth, tangy richness of classic cheesecake with the irresistible chew of gooey caramel and the delightful crunch of caramel popcorn. Imagine sinking your spoon into a buttery graham cracker crust, followed by a cloud-like cheesecake filling, all crowned with a generous drizzle of luscious caramel and a pile of perfectly crisp, caramel-coated popcorn. These individual dessert cups are not just a treat for the taste buds; they’re a feast for the eyes, making them the ultimate crowd-pleaser for any party, gathering, or simply a luxurious indulgence for yourself.
What makes these Caramel Popcorn Cheesecake Cups truly special is their harmonious blend of textures and flavors. Each bite delivers a symphony of sensations: the tender crumble of the crust, the velvety smoothness of the cheesecake, the sticky sweetness of the caramel, and the satisfying pop of the popcorn. They offer all the beloved elements of a traditional cheesecake but in a convenient, portion-controlled format that’s perfect for individual servings. Forget the fuss of slicing a large cheesecake; these elegant cups are easy to grab, easy to eat, and leave a lasting impression. Impressive enough for a special occasion yet surprisingly approachable to make, they’re destined to become your new favorite dessert sensation.
Whether you’re a seasoned baker or just looking for a fun and delicious project, these Caramel Popcorn Cheesecake Cups are a recipe you’ll want to keep in your repertoire. They strike that perfect balance between sophisticated dessert and playful treat, appealing to both adults and children alike. Prepare to dazzle your guests and delight your palate with this unforgettable combination that proves sweet and salty truly is a match made in dessert heaven.
Nutritional Information
Per serving (approximate values):
- Calories: 480
- Protein: 7g
- Carbohydrates: 55g
- Fat: 27g
- Fiber: 1g
- Sodium: 320mg
Ingredients
- For the Graham Cracker Crust:
- 1 ½ cups graham cracker crumbs (about 10-12 full graham cracker sheets)
- ¼ cup granulated sugar
- ½ cup unsalted butter, melted
- For the Cheesecake Filling:
- 2 (8-ounce) packages full-fat cream cheese, softened to room temperature
- ½ cup granulated sugar
- 2 large eggs, room temperature
- 1 teaspoon vanilla extract
- ¼ cup sour cream or full-fat Greek yogurt, room temperature
- Pinch of salt
- For the Caramel Topping:
- 1 cup store-bought caramel sauce, or homemade (recipe below if preferred)
- For the Caramel Popcorn Topping:
- 4 cups prepared caramel popcorn (store-bought or homemade)
- Optional Homemade Caramel Sauce:
- ½ cup unsalted butter
- ½ cup packed light brown sugar
- ¼ cup granulated sugar
- ¼ cup heavy cream
- 1 teaspoon vanilla extract
- Pinch of salt
Instructions
- Prepare for Baking: Preheat your oven to 325°F (160°C). Line a standard 12-cup muffin tin with paper cupcake liners. If using a water bath (highly recommended for crack-free cheesecake), prepare a larger roasting pan by placing the muffin tin inside it.
- Make the Graham Cracker Crust: In a medium bowl, combine the graham cracker crumbs and ¼ cup granulated sugar. Pour in the melted butter and mix thoroughly with a fork until the crumbs are evenly moistened and resemble wet sand.
- Form the Crusts: Divide the graham cracker mixture evenly among the 12 prepared cupcake liners, placing about 1 ½ to 2 tablespoons in each. Use the back of a spoon or a small measuring cup to firmly press the crumbs into an even layer at the bottom of each liner.
- Bake the Crusts: Bake the crusts in the preheated oven for 5-7 minutes, just until lightly fragrant and set. Remove from the oven and let cool slightly while you prepare the cheesecake filling.
- Prepare the Cheesecake Filling: In a large mixing bowl, using an electric mixer (stand mixer with paddle attachment or hand mixer), beat the softened cream cheese on medium speed until completely smooth and creamy, about 2-3 minutes. Make sure there are no lumps.
- Add Sugar: Gradually add the ½ cup granulated sugar to the cream cheese, beating until well combined and smooth, scraping down the sides of the bowl as needed.
- Incorporate Eggs and Vanilla: Add the eggs one at a time, beating on low speed just until each egg is incorporated. Be careful not to overmix once the eggs are added, as overmixing can introduce too much air and lead to cracks. Stir in the vanilla extract and the pinch of salt.
- Add Sour Cream: Fold in the sour cream (or Greek yogurt) until just combined. The batter should be smooth and creamy.
- Fill the Liners: Divide the cheesecake batter evenly among the 12 crust-lined cupcake liners, filling each about ¾ full.
- Bake the Cheesecakes (with or without water bath):
- Cool the Cheesecakes: Once baked, turn off the oven and prop the oven door open slightly with a wooden spoon. Let the cheesecake cups cool in the oven for an additional 15-20 minutes. This gradual cooling helps prevent cracking.
- Remove and Chill: Carefully remove the muffin tin from the oven (and water bath if used). Let the cheesecake cups cool completely at room temperature on a wire rack. Once fully cooled, transfer the muffin tin to the refrigerator and chill for at least 4 hours, or preferably overnight, until thoroughly set.
- Prepare Caramel Sauce (if homemade): If making homemade caramel sauce, combine butter, brown sugar, and granulated sugar in a medium saucepan over medium heat. Stir until butter is melted and sugars are dissolved. Bring to a boil, then reduce heat to low and simmer for 5 minutes, stirring occasionally. Remove from heat, stir in heavy cream, vanilla extract, and salt. Whisk until smooth. Let cool slightly before using.
- Assemble the Topping: Once the cheesecake cups are thoroughly chilled and firm, gently remove them from the muffin tin. If your store-bought caramel sauce is too thick, warm it slightly in the microwave for 15-30 seconds until it’s a good drizzling consistency.
- Garnish and Serve: Drizzle a generous amount of caramel sauce over the top of each chilled cheesecake cup. Then, pile a handful of caramel popcorn on top of the caramel drizzle. Serve immediately for optimal popcorn crunch.
Cooking Tips and Variations
For the absolute best Caramel Popcorn Cheesecake Cups, attention to detail makes all the difference. Always start with room temperature ingredients , especially the cream cheese, eggs, and sour cream. This is paramount for achieving a perfectly smooth, lump-free cheesecake batter. Cold cream cheese will result in a lumpy batter no matter how long you beat it, affecting the final texture. When beating the cream cheese, ensure it’s completely smooth before adding any other ingredients. When adding the eggs, mix them in one at a time on low speed, just until incorporated. Overmixing after the eggs are added can introduce too much air into the batter, which can cause the cheesecake to puff up in the oven and then crack as it cools. Gentle mixing is key to a dense, creamy texture.
While the recipe notes a water bath as optional, I highly recommend it for an extra creamy, crack-free cheesecake. The steam from the water bath creates a moist baking environment that helps the cheesecake bake evenly and prevents the surface from drying out and cracking. If you don’t use a water bath, don’t fret, the cheesecake will still be delicious, but you might notice small hairline cracks. Gradual cooling is also essential: after baking, turn off the oven and let the cheesecake cups cool inside with the door propped open for 15-20 minutes. This prevents a sudden temperature shock that can cause cracks. And finally, chilling time is crucial . Don’t rush it! At least 4 hours, or ideally overnight, in the refrigerator allows the cheesecake to fully set, firm up, and for the flavors to meld beautifully. A well-chilled cheesecake is not only easier to handle but also has a superior texture and taste.
To ensure your caramel popcorn topping stays wonderfully crunchy, it’s best to add it just before serving. If you add it too far in advance, the moisture from the cheesecake and caramel sauce can soften the popcorn, diminishing that satisfying crunch. You can store the un-topped cheesecake cups in the refrigerator and then add the caramel drizzle and popcorn right before presenting them. For variations, feel free to experiment with the crust: try crushed Oreo cookies for a chocolatey twist, or crushed pretzels for an even more pronounced sweet and salty profile. A drizzle of melted dark chocolate over the caramel before adding the popcorn would be a decadent addition. You could also sprinkle a few chopped pecans or peanuts on top for an extra nutty crunch. For different popcorn flavors, consider a cinnamon sugar popcorn or a white cheddar popcorn for an adventurous savory-sweet combination.
Storage and Reheating
These Caramel Popcorn Cheesecake Cups are best enjoyed chilled. Store any leftover cheesecake cups, without the caramel popcorn topping, in an airtight container in the refrigerator for up to 3-4 days. It is crucial to store them without the popcorn on top, as the moisture from the cheesecake and caramel sauce will quickly make the popcorn soggy. If you have extra caramel popcorn, store it separately in an airtight container at room temperature to maintain its crispness.
When you’re ready to enjoy a leftover cheesecake cup, simply remove it from the refrigerator, drizzle with a fresh layer of caramel sauce if desired, and then pile on some fresh caramel popcorn. These cheesecake cups are designed to be served cold and do not require reheating. In fact, reheating would melt the cheesecake and ruin its delicate texture. Always serve them chilled for the best experience.
Frequently Asked Questions
Can I make these Caramel Popcorn Cheesecake Cups ahead of time for a party?
Absolutely! These cheesecake cups are an excellent make-ahead dessert. You can bake the cheesecake cups and chill them for up to 2-3 days in advance. Store them in an airtight container in the refrigerator without the caramel sauce or popcorn topping. On the day of your party, simply drizzle with caramel and pile on the fresh caramel popcorn just before serving to ensure the popcorn stays crunchy and delicious.
What kind of caramel popcorn should I use?
You can use either store-bought caramel popcorn or homemade caramel popcorn for this recipe. If buying, look for a good quality, fresh caramel popcorn that is still crunchy. If making your own, ensure it’s cooled completely before adding to the cheesecakes. The key is to have a robust caramel flavor and a good crunch to contrast with the creamy cheesecake.
My cheesecake cracked during baking. What went wrong?
Cheesecakes can crack for a few reasons. The most common causes are overmixing the batter (which incorporates too much air), overbaking (drying out the cheesecake), or a sudden change in temperature (cooling too quickly). To prevent cracks, ensure your ingredients are at room temperature, beat the cream cheese until smooth before adding other ingredients, avoid overmixing once eggs are added, use a water bath if possible, and allow the cheesecakes to cool gradually in the turned-off oven before transferring to the refrigerator.
Can I make a larger cheesecake instead of individual cups?
Yes, you can adapt this recipe to make a full-sized cheesecake. You would need to use a 9-inch springform pan for the crust and filling. The baking time will be significantly longer, likely around 45-60 minutes, and a water bath would be even more highly recommended. The cooling and chilling process would remain the same, followed by the caramel and popcorn topping once completely chilled.
Caramel Popcorn Cheesecake Cups
Ingredients
Instructions
Prepare for Baking: Preheat your oven to 325°F (160°C). Line a standard 12-cup muffin tin with paper cupcake liners. If using a water bath (highly recommended for crack-free cheesecake), prepare a larger roasting pan by placing the muffin tin inside it.
Make the Graham Cracker Crust: In a medium bowl, combine the graham cracker crumbs and ¼ cup granulated sugar. Pour in the melted butter and mix thoroughly with a fork until the crumbs are evenly moistened and resemble wet sand.
Form the Crusts: Divide the graham cracker mixture evenly among the 12 prepared cupcake liners, placing about 1 ½ to 2 tablespoons in each. Use the back of a spoon or a small measuring cup to firmly press the crumbs into an even layer at the bottom of each liner.
Bake the Crusts: Bake the crusts in the preheated oven for 5-7 minutes, just until lightly fragrant and set. Remove from the oven and let cool slightly while you prepare the cheesecake filling.
Prepare the Cheesecake Filling: In a large mixing bowl, using an electric mixer (stand mixer with paddle attachment or hand mixer), beat the softened cream cheese on medium speed until completely smooth and creamy, about 2-3 minutes. Make sure there are no lumps.
Add Sugar: Gradually add the ½ cup granulated sugar to the cream cheese, beating until well combined and smooth, scraping down the sides of the bowl as needed.
Incorporate Eggs and Vanilla: Add the eggs one at a time, beating on low speed just until each egg is incorporated. Be careful not to overmix once the eggs are added, as overmixing can introduce too much air and lead to cracks. Stir in the vanilla extract and the pinch of salt.
Add Sour Cream: Fold in the sour cream (or Greek yogurt) until just combined. The batter should be smooth and creamy.
Fill the Liners: Divide the cheesecake batter evenly among the 12 crust-lined cupcake liners, filling each about ¾ full.
Bake the Cheesecakes (with or without water bath):
Cool the Cheesecakes: Once baked, turn off the oven and prop the oven door open slightly with a wooden spoon. Let the cheesecake cups cool in the oven for an additional 15-20 minutes. This gradual cooling helps prevent cracking.
Remove and Chill: Carefully remove the muffin tin from the oven (and water bath if used). Let the cheesecake cups cool completely at room temperature on a wire rack. Once fully cooled, transfer the muffin tin to the refrigerator and chill for at least 4 hours, or preferably overnight, until thoroughly set.
Prepare Caramel Sauce (if homemade): If making homemade caramel sauce, combine butter, brown sugar, and granulated sugar in a medium saucepan over medium heat. Stir until butter is melted and sugars are dissolved. Bring to a boil, then reduce heat to low and simmer for 5 minutes, stirring occasionally. Remove from heat, stir in heavy cream, vanilla extract, and salt. Whisk until smooth. Let cool slightly before using.
Assemble the Topping: Once the cheesecake cups are thoroughly chilled and firm, gently remove them from the muffin tin. If your store-bought caramel sauce is too thick, warm it slightly in the microwave for 15-30 seconds until it’s a good drizzling consistency.
Garnish and Serve: Drizzle a generous amount of caramel sauce over the top of each chilled cheesecake cup. Then, pile a handful of caramel popcorn on top of the caramel drizzle. Serve immediately for optimal popcorn crunch.