Introduction
There’s something undeniably magical about the holiday season, and for many, that magic truly comes alive in the kitchen. As the air fills with the scent of cinnamon and pine, our thoughts turn to festive treats that bring joy and warmth to gatherings. Among these cherished traditions, the Christmas Sprinkle Cookie stands out as a beacon of cheer. These delightful cookies are more than just a dessert; they’re edible little bursts of holiday spirit, perfect for sharing, gifting, or simply savoring with a cup of hot cocoa by a crackling fire. Their vibrant red, green, and white sprinkles immediately evoke the festive season, making them an instant hit with both children and adults alike.
What makes Christmas Sprinkle Cookies so beloved is their irresistible combination of simplicity and charm. They boast a tender, buttery base that melts in your mouth, providing the perfect canvas for a shower of colorful, crunchy sprinkles. This recipe is wonderfully approachable for bakers of all skill levels, ensuring that even novice cooks can achieve beautiful, bakery-worthy results. From mixing the dough to rolling it in a cascade of festive sprinkles, each step is infused with the joy of holiday baking. These cookies are not only a feast for the taste buds but also a feast for the eyes, making them a centerpiece on any holiday dessert platter.
Beyond their delightful taste and ease of preparation, Christmas Sprinkle Cookies are incredibly versatile. They make for exquisite homemade gifts, thoughtfully packaged in festive boxes or cellophane bags, bringing a personal touch to holiday giving. They’re also an absolute must-have for holiday parties, cookie exchanges, or simply as a sweet treat to enjoy with your family throughout December. Their cheerful appearance and comforting flavor embody everything we love about the festive season, making them a truly special addition to your holiday baking repertoire. Get ready to spread some holiday cheer, one delicious sprinkle cookie at a time!
Nutritional Information
Per serving (approximate values, based on 30 cookies per batch):
- Calories: 150
- Protein: 2g
- Carbohydrates: 20g
- Fat: 7g
- Fiber: 0.5g
- Sodium: 80mg
Ingredients
- 2 ½ cups all-purpose flour
- 1 teaspoon baking powder
- ½ teaspoon salt
- 1 cup (2 sticks) unsalted butter, softened
- 1 ½ cups granulated sugar
- 2 large eggs
- 2 teaspoons pure vanilla extract
- 1 cup Christmas-themed sprinkles (red, green, and white nonpareils or jimmies)
Instructions
- Preheat your oven to 375°F (190°C). Line two large baking sheets with parchment paper. This will prevent your cookies from sticking and ensure easy cleanup.
- In a medium bowl, whisk together the all-purpose flour, baking powder, and salt. Set aside. This step ensures that your dry ingredients are evenly distributed, leading to a consistent cookie texture.
- In a large bowl, using an electric mixer on medium speed, cream together the softened unsalted butter and granulated sugar until the mixture is light and fluffy. This typically takes about 2-3 minutes. Proper creaming incorporates air, which contributes to a tender cookie.
- Add the eggs one at a time, beating well after each addition until fully incorporated. Then, stir in the pure vanilla extract. Scrape down the sides of the bowl to ensure everything is thoroughly mixed.
- Gradually add the dry ingredient mixture to the wet ingredients, mixing on low speed until just combined. Be careful not to overmix the dough, as this can lead to tough cookies. The dough should come together into a cohesive mass.
- Place the Christmas-themed sprinkles in a shallow dish or bowl.
- Scoop rounded tablespoons of cookie dough and roll them into smooth balls between your palms. For uniform size, a cookie scoop works wonders.
- Roll each cookie dough ball generously in the Christmas sprinkles, ensuring all sides are well-coated. Gently press the sprinkles into the dough ball to help them adhere.
- Place the sprinkle-coated dough balls onto the prepared baking sheets, leaving about 2 inches between each cookie to allow for spreading during baking.
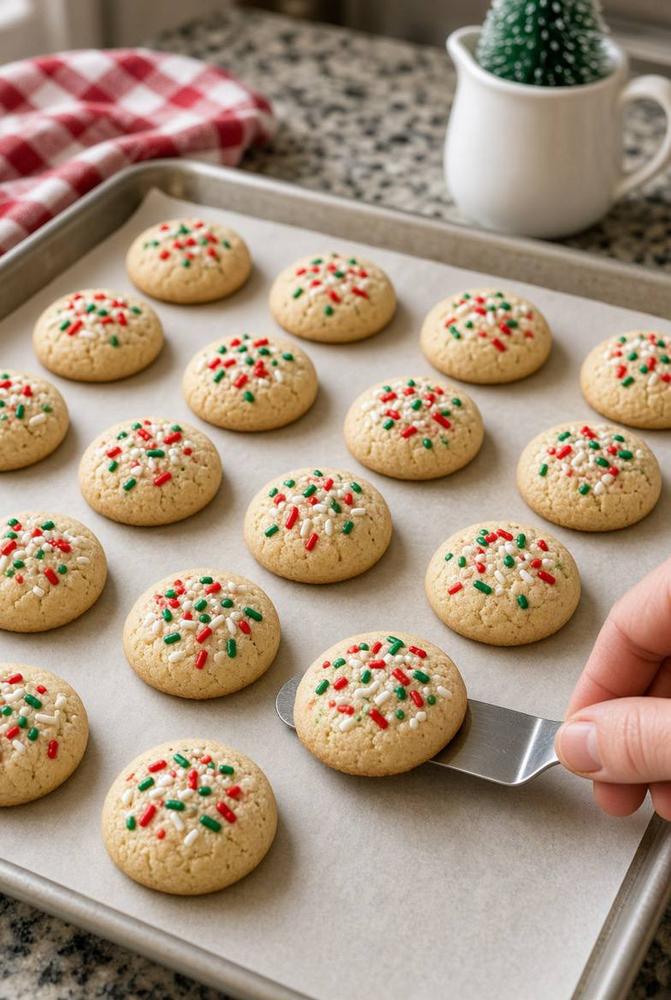
- Bake for 9-11 minutes, or until the edges are lightly golden brown and the centers are just set. The cookies should still look slightly pale in the center. Avoid overbaking to maintain a soft, chewy texture.
- Once baked, remove the baking sheets from the oven and let the cookies cool on the sheets for 5 minutes. This allows them to firm up before transferring.
- Carefully transfer the cooled cookies to a wire rack to cool completely.
Cooking Tips and Variations
For the best Christmas Sprinkle Cookies, paying attention to a few key details can make all the difference. Firstly, ensure your butter is truly softened, not melted. Softened butter creams beautifully with sugar, creating that essential light and fluffy base. If your kitchen is warm, you might find the dough a bit sticky; in this case, a quick chill in the refrigerator for 15-30 minutes can make it much easier to handle and roll. When applying sprinkles, don’t be shy! Roll the dough balls generously to get a vibrant, festive coating. You can even gently press the sprinkles into the dough to ensure they adhere well and don’t fall off during baking. Using parchment paper on your baking sheets is a non-negotiable for these cookies; it prevents sticking and ensures even baking, as well as easy cleanup. To ensure all your cookies bake evenly, consider rotating your baking sheets halfway through the baking time, especially if your oven has hot spots. Look for the edges to be lightly golden, but the centers should still appear soft and slightly pale, indicating a perfectly tender cookie. Overbaking is the enemy of a soft sprinkle cookie!
Now for some delightful variations to keep things exciting! While vanilla extract is a classic, you can easily switch up the flavor profile. Try adding ½ teaspoon of almond extract along with the vanilla for a subtle, nutty undertone, or use ½ teaspoon of peppermint extract for a refreshing, minty holiday twist. For a citrusy brightness, add 1 tablespoon of finely grated orange or lemon zest to the wet ingredients. You can also experiment with different types of sprinkles. While the red, green, and white nonpareils are iconic for Christmas, feel free to use other festive mixes, perhaps some metallic gold or silver sprinkles for New Year’s, or even a different color scheme for a non-holiday occasion. For a richer cookie, you could swap out a quarter cup of flour for cocoa powder to make chocolate sprinkle cookies. Another fun idea is to dip the cooled cookies halfway into melted white chocolate and then immediately add more sprinkles for an extra layer of decadence and visual appeal. The possibilities are as endless as your holiday imagination!
Storage and Reheating
Proper storage is key to keeping your Christmas Sprinkle Cookies fresh and delicious for as long as possible. Once completely cooled, store the cookies in an airtight container at room temperature. They will maintain their best quality for up to 5-7 days. To prevent them from drying out, you can place a slice of bread in the container with the cookies; the bread will absorb moisture, keeping the cookies soft. Avoid storing them in the refrigerator, as this can actually dry them out and make them hard. If you’ve made a large batch and want to enjoy them over a longer period, these cookies freeze beautifully. Once completely cooled, arrange them in a single layer on a baking sheet and freeze until solid, about 1-2 hours. Then, transfer the frozen cookies to a freezer-safe airtight container or heavy-duty freezer bag, separating layers with parchment paper to prevent sticking. They can be frozen for up to 2-3 months.
When you’re ready to enjoy your frozen Christmas Sprinkle Cookies, there’s no need for any special reheating. Simply remove the desired number of cookies from the freezer and let them thaw at room temperature for about 15-30 minutes. They will soften up perfectly on their own. If you prefer a slightly warm cookie, you can briefly warm them in a microwave for 10-15 seconds, or in a preheated oven at 275°F (135°C) for 3-5 minutes. Be careful not to overheat, as this can cause the sprinkles to melt or the cookies to become hard. The beauty of these cookies is that they are equally delightful at room temperature, making them a convenient grab-and-go treat during the busy holiday season.
Frequently Asked Questions
Why are my sprinkle cookies spreading too much?
Cookies spreading too much can be caused by several factors. Your butter might have been too soft or even slightly melted, leading to a thinner dough. Ensure your butter is just softened, not greasy. Also, make sure your oven temperature is accurate; if it’s too low, the cookies will spread before they set. Chilling the dough for 30 minutes to an hour before baking can also help prevent excessive spreading, as it firms up the butter in the dough.
Can I make the dough ahead of time?
Absolutely! This dough is excellent for making ahead. You can prepare the dough, wrap it tightly in plastic wrap, and store it in the refrigerator for up to 3 days. When you’re ready to bake, let the dough sit at room temperature for about 15-20 minutes to soften slightly before rolling and baking. You can also roll the dough into balls and coat them in sprinkles, then freeze them on a baking sheet before transferring to a freezer bag. Bake directly from frozen, adding a minute or two to the baking time.
What kind of sprinkles work best?
For Christmas Sprinkle Cookies, nonpareils (the tiny round balls) or jimmies (the longer, cylindrical sprinkles) in red, green, and white are ideal. Nonpareils tend to hold their color and shape very well during baking and create a beautiful, dense coating. Jimmies also work well and offer a slightly different texture. Avoid very large or flat sprinkles, as they might melt or lose their shape more easily. Always check the expiration date on your sprinkles to ensure they are fresh and vibrant.
Christmas Sprinkle Cookies
Ingredients
Instructions
Preheat your oven to 375°F (190°C). Line two large baking sheets with parchment paper. This will prevent your cookies from sticking and ensure easy cleanup.
In a medium bowl, whisk together the all-purpose flour, baking powder, and salt. Set aside. This step ensures that your dry ingredients are evenly distributed, leading to a consistent cookie texture.
In a large bowl, using an electric mixer on medium speed, cream together the softened unsalted butter and granulated sugar until the mixture is light and fluffy. This typically takes about 2-3 minutes. Proper creaming incorporates air, which contributes to a tender cookie.
Add the eggs one at a time, beating well after each addition until fully incorporated. Then, stir in the pure vanilla extract. Scrape down the sides of the bowl to ensure everything is thoroughly mixed.
Gradually add the dry ingredient mixture to the wet ingredients, mixing on low speed until just combined. Be careful not to overmix the dough, as this can lead to tough cookies. The dough should come together into a cohesive mass.
Place the Christmas-themed sprinkles in a shallow dish or bowl.
Scoop rounded tablespoons of cookie dough and roll them into smooth balls between your palms. For uniform size, a cookie scoop works wonders.
Roll each cookie dough ball generously in the Christmas sprinkles, ensuring all sides are well-coated. Gently press the sprinkles into the dough ball to help them adhere.
Place the sprinkle-coated dough balls onto the prepared baking sheets, leaving about 2 inches between each cookie to allow for spreading during baking.
Bake for 9-11 minutes, or until the edges are lightly golden brown and the centers are just set. The cookies should still look slightly pale in the center. Avoid overbaking to maintain a soft, chewy texture.
Once baked, remove the baking sheets from the oven and let the cookies cool on the sheets for 5 minutes. This allows them to firm up before transferring.
Carefully transfer the cooled cookies to a wire rack to cool completely.