- 0 Facebook
- 9 Pinterest
- 0 Email
- Copy Link
- 9 shares
I still remember the first time I attempted to make pita bread from scratch. It was a rainy Saturday afternoon, and I was craving something warm and comforting to go with my homemade hummus. After scrolling through countless complicated recipes that required hours of rising time and special equipment, I felt defeated. That’s when my neighbor, Mrs. Chen, knocked on my door with a plate of the most perfect, pillowy pita bread I’d ever tasted.
“Ten minutes,” she said with a knowing smile when I asked for her secret. “That’s all you need.”
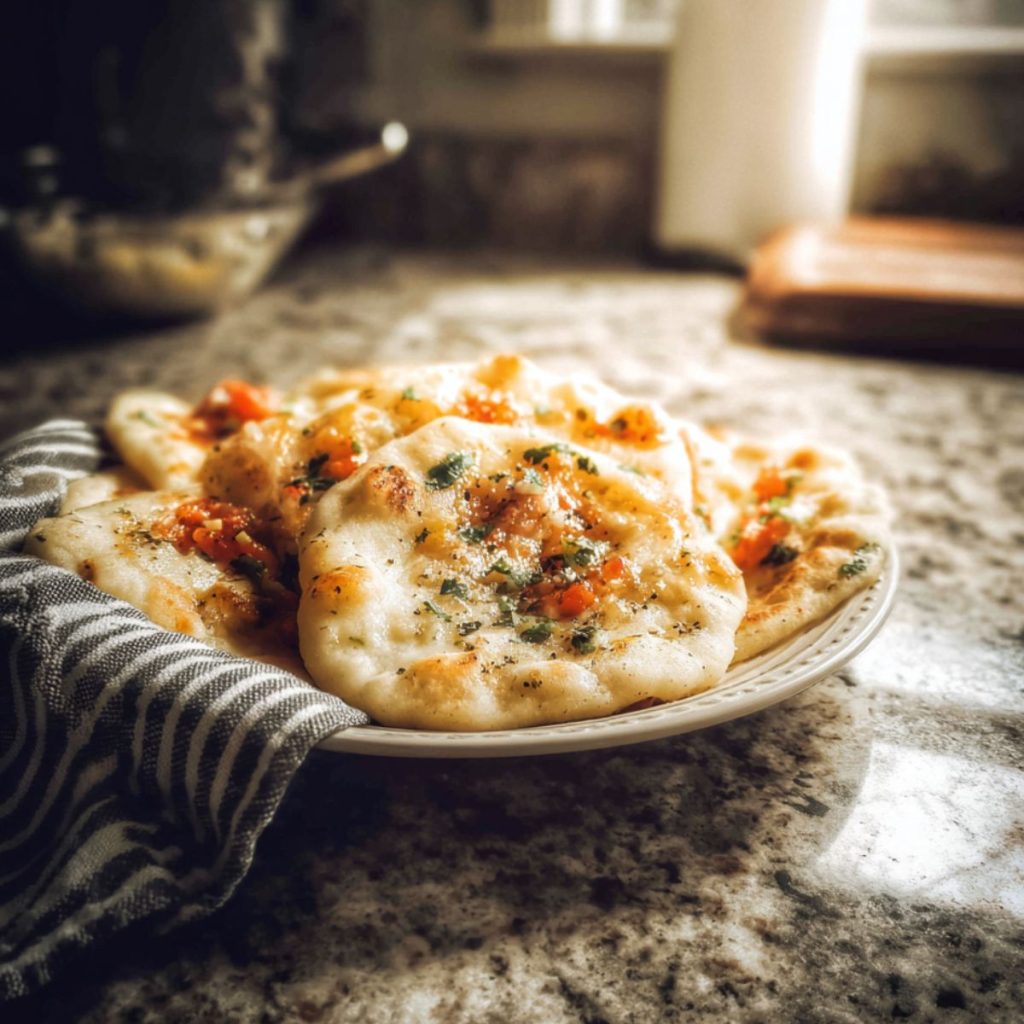
I thought she was pulling my leg, but she walked me through her simple method right there in my kitchen. Using just five pantry staples and a hot skillet , we had fresh, warm pita bread ready in no time. The magic wasn’t in complicated techniques or fancy ingredients – it was in the beautiful simplicity of good food made with love.
This recipe has become my go-to whenever I need something quick, satisfying, and absolutely delicious. Whether you’re a complete beginner or a seasoned cook looking for a reliable shortcut, this 10-minute pita bread will change the way you think about homemade bread forever.
Why You’ll Love This Recipe
- Ready in 10 minutes – Quick prep and cook time combined
- Foolproof method – No kneading, no rising, no stress
- Pantry-friendly – Uses common ingredients you likely already have
- Incredibly versatile – Perfect for dips, sandwiches, or eating warm with butter
- Soft and pillowy – Rivals any store-bought version
- No special equipment – Just a bowl, rolling pin, and skillet
- Beginner-friendly – So simple, even kids can help make it
Ingredients Notes
- All-purpose flour – I always use unbleached all-purpose flour as it provides the perfect structure without being too heavy. The protein content creates just enough gluten for a tender, flexible pita that won’t crack when folded.
- Baking powder – This is your secret weapon for fluffy pita bread. Fresh baking powder (check the expiration date!) creates those beautiful air pockets that make the bread light and airy rather than dense.
- Salt – Don’t skip this! I use fine sea salt to enhance all the other flavors. It also helps strengthen the dough structure, giving you a more cohesive bread that holds together beautifully.
- Plain yogurt – Greek or regular works perfectly. The tanginess adds incredible depth of flavor while the acidity tenderizes the dough. Room temperature yogurt mixes more easily than cold from the fridge.
- Olive oil – I prefer extra virgin for its rich flavor, but any good-quality olive oil works. This keeps the pita soft and adds a subtle richness that makes each bite absolutely irresistible.
How to Make 10-Minute Pita Bread
Step 1: In a medium mixing bowl, whisk together the flour, baking powder, and salt until well combined. This ensures even distribution of the leavening agent throughout your dough.
Step 2: Create a well in the center of the dry ingredients. Add the yogurt and olive oil into the well of dry ingredients. Using a fork, gradually incorporate the wet ingredients into the dry, mixing until a shaggy dough forms.
Step 3: Transfer the dough to a lightly floured surface and gently knead for 30-60 seconds, just until it comes together into a smooth ball. The dough should feel soft and slightly sticky – resist the urge to add too much flour.
Step 4: Divide the dough into 4 equal portions. Roll each piece into a ball, then use a rolling pin to flatten each ball into a thin circle, about 6-7 inches in diameter and ¼-inch thick.
Step 5: Heat a large skillet or cast-iron pan over medium-high heat. No oil is needed in the pan—just heat it dry! Once hot, carefully place one pita round in the pan. Cook for 1-2 minutes until bubbles form on the surface and the bottom is lightly golden.
Step 6: Flip the pita and cook for another 1-2 minutes until the second side is golden and the pita has puffed slightly. Remove from heat and cover with a clean kitchen towel to keep warm while you cook the remaining pitas.
Step 7: Serve immediately while warm, or let cool completely before storing. The bread is at its absolute best when fresh from the skillet !
Expert Cooking Tips
- I always test my skillet temperature by sprinkling a few drops of water – they should sizzle and evaporate immediately for perfect pita cooking heat.
- Don’t overwork the dough – gentle mixing and minimal kneading keeps the texture tender rather than tough and chewy.
- Roll evenly for best results – consistent thickness ensures even cooking and prevents some areas from burning while others stay raw.
- Keep cooked pitas covered – a damp towel maintains moisture and prevents them from drying out while you finish the batch.
- Adjust heat as needed – if your pitas are browning too quickly, reduce heat to medium to prevent burning before they’re cooked through.
Expert Cooking Tips
- I always test my skillet temperature by sprinkling a few drops of water – they should sizzle and evaporate immediately for perfect pita cooking heat.
- Don’t overwork the dough – gentle mixing and minimal kneading keeps the texture tender rather than tough and chewy.
- Roll evenly for best results – consistent thickness ensures even cooking and prevents some areas from burning while others stay raw.
- Keep cooked pitas covered – a damp towel maintains moisture and prevents them from drying out while you finish the batch.
- Adjust heat as needed – if your pitas are browning too quickly, reduce heat to medium to prevent burning before they’re cooked through.
Expert Cooking Tips
- I always test my skillet temperature by sprinkling a few drops of water – they should sizzle and evaporate immediately for perfect pita cooking heat.
- Don’t overwork the dough – gentle mixing and minimal kneading keeps the texture tender rather than tough and chewy.
- Roll evenly for best results – consistent thickness ensures even cooking and prevents some areas from burning while others stay raw.
- Keep cooked pitas covered – a damp towel maintains moisture and prevents them from drying out while you finish the batch.
- Adjust heat as needed – if your pitas are browning too quickly, reduce heat to medium to prevent burning before they’re cooked through.
Storage Tips
- Wrap leftover pitas in plastic wrap or an airtight bag and refrigerate for up to 3 days to maintain softness and prevent drying out.
- Freeze individually wrapped pitas for up to 3 months – separate with parchment paper to prevent sticking together when frozen.
- Reheat in a dry skillet for 30 seconds per side to restore warmth and flexibility without making them soggy.
- Microwave briefly (10-15 seconds) wrapped in a damp paper towel for quick reheating that maintains moisture.
Variations and Substitutions
- Whole wheat version – substitute half the all-purpose flour with whole wheat flour for added nutrition and nutty flavor.
- Dairy-free option – replace yogurt with unsweetened coconut yogurt or cashew yogurt for the same tangy flavor and tender texture.
- Herb-infused pitas – add 1 tablespoon dried herbs like oregano, thyme, or za’atar to the flour mixture for Mediterranean flair.
- Garlic lovers – mix ½ teaspoon garlic powder into the dry ingredients for a subtle garlic flavor throughout.
- Sweet version – add 1 tablespoon honey to the wet ingredients for slightly sweet pitas perfect with fruit or chocolate spreads.
What to Serve with 10-Minute Pita Bread
- Classic hummus and vegetables – the creamy dip pairs perfectly with the soft bread texture for a satisfying Mediterranean-inspired meal.
- Grilled chicken or lamb – stuff warm pitas with seasoned meat and fresh vegetables for quick, delicious wraps or gyros.
- Fresh Mediterranean salad – serve alongside tomatoes, cucumbers, olives, and feta cheese for a light, refreshing combination.
- Hearty soups and stews – use as a bread dipper for lentil soup, chili, or any brothy dish that needs a carb companion.
- Breakfast spreads – top with avocado, eggs, or nut butter for a quick morning meal with international flair.
Make it a Meal: Try pairing these warm pitas with our creamy tzatziki recipe or quick grilled chicken skewers for a complete Mediterranean-inspired dinner that’s ready in under 20 minutes!
FAQ
Q: Why didn’t my pitas puff up? A: Heat too low or dough too thick. Use medium-high heat and roll thinner.
Q: Can I make the dough ahead? A: Yes, refrigerate up to 24 hours. Bring to room temperature before cooking.
Q: My pitas are too dry. What happened? A: Overcooked or insufficient yogurt. Cook shorter and measure yogurt accurately.
Q: Can I use self-rising flour instead? A: Skip baking powder if using self-rising flour to avoid over-leavening.
Q: How do I know when the skillet is ready? A: Water drops should sizzle immediately. Too hot burns, too cool won’t puff.
- 0 Facebook
- 9 Pinterest
- 0 Email
- Copy Link
- 9 shares
10-Minute Pita Bread
Ingredients
Instructions
- Step 1
In a medium mixing bowl, whisk together the flour, baking powder, and salt until well combined. This ensures even distribution of the leavening agent throughout your dough.
- Step 2
Create a well in the center of the dry ingredients. Add the yogurt and olive oil into the well of dry ingredients. Using a fork, gradually incorporate the wet ingredients into the dry, mixing until a shaggy dough forms.
- Step 3
Transfer the dough to a lightly floured surface and gently knead for 30-60 seconds, just until it comes together into a smooth ball. The dough should feel soft and slightly sticky – resist the urge to add too much flour.
- Step 4
Divide the dough into 4 equal portions. Roll each piece into a ball, then use a rolling pin to flatten each ball into a thin circle, about 6-7 inches in diameter and ¼-inch thick.
- Step 5
Heat a large skillet or cast-iron pan over medium-high heat. No oil is needed in the pan—just heat it dry! Once hot, carefully place one pita round in the pan. Cook for 1-2 minutes until bubbles form on the surface and the bottom is lightly golden.
- Step 6
Flip the pita and cook for another 1-2 minutes until the second side is golden and the pita has puffed slightly. Remove from heat and cover with a clean kitchen towel to keep warm while you cook the remaining pitas.
- Step 7
Serve immediately while warm, or let cool completely before storing. The bread is at its absolute best when fresh from the skillet!